
Today I’m sharing six quick SEO wins that you can implement on your website to improve your SEO.
After analyzing hundreds of websites, I’ve noticed that there are a few common SEO mistakes that come up again and again, but are also relatively quick fixes.
If you’re an experienced blogger, hopefully, you already have most of these things in place, but I also know that sometimes it’s easy to get tunnel vision on your site and forget about some of the basics.
So let’s go through the 6 quick tasks and hopefully at least one, if not all of them, will apply to you and give you a nice little website improvement this week!
Would you like to save this?
*This post contains affiliate links, clearly marked with an asterisk (*). If you click on these links and make a purchase, I may earn a commission.
What we cover:
1. Optimize Your Homepage’s Title Tag for a Strong First Impression
Ever Googled your business and felt that the title displayed doesn’t do justice to what you offer?
You’re not alone. Many businesses miss out on optimizing their homepage’s title tag, a small yet significant element that can enhance your visibility on search engines.
What is a Title Tag?
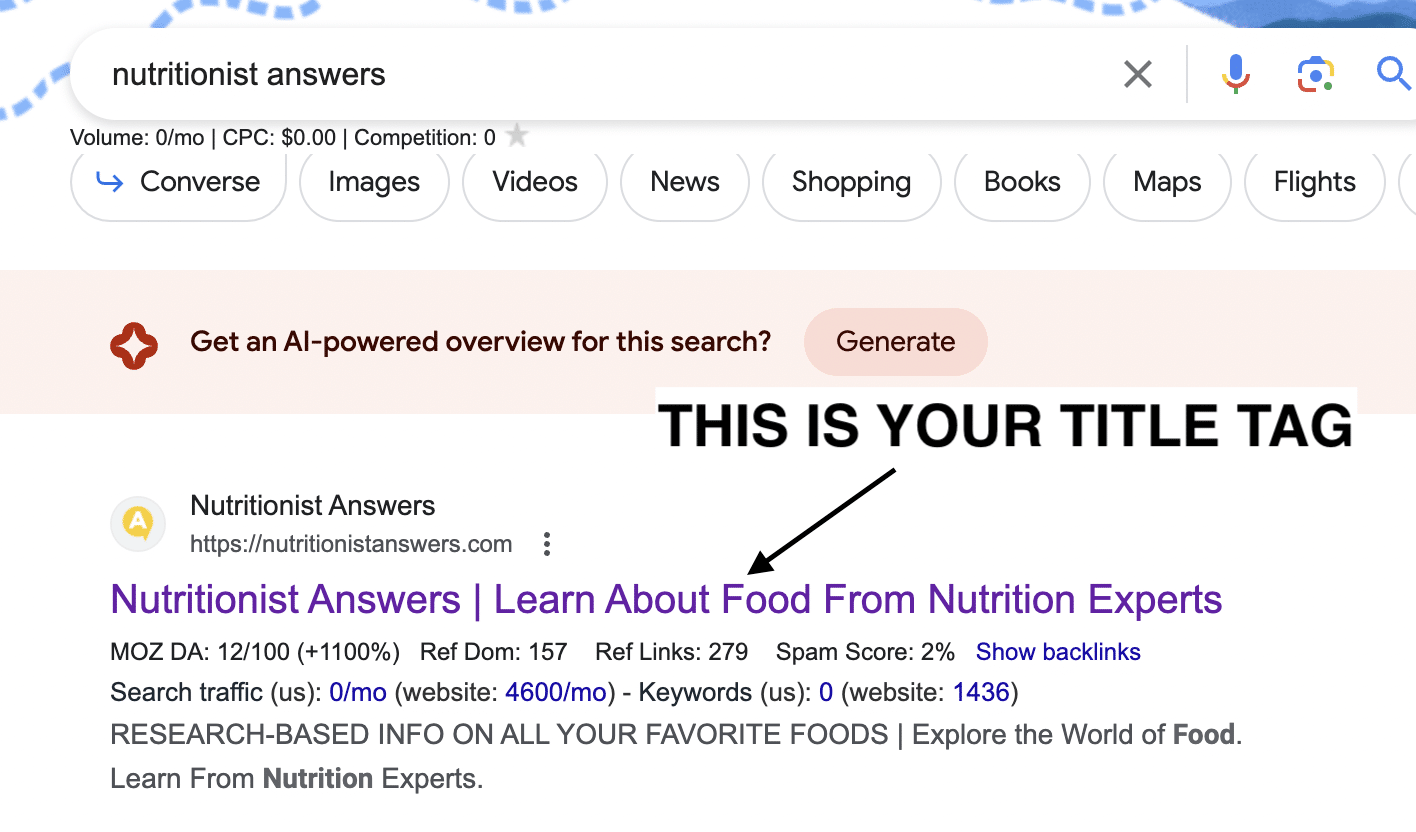
A title tag is the clickable title displayed in the search results for any page or post on your website. It’s your first opportunity to attract potential visitors and convey what your site is all about.
Why is it Important?
While a significant portion of people searching for your brand might already know you, there’s a chance that some are hearing about you for the first time. A well-optimized title tag can provide them with a clear idea of what to expect from your website, encouraging them to click through.
How to Optimize Your Title Tag
- Google your business name from a computer browser and find your website in the results.
- Analyze the current title tag. If it only displays your brand name followed by “Home,” or just the brand name, it’s time for optimization.
- Find inspiration. Look at how successful brands in your niche have optimized their title tags. For instance:
- “A Little Bit Yummy: Low Fodmap Diet Recipes & Meal Plans”
- “Rick Mulready: Business Coach and Online Ads Expert”
- “Amy Porterfield: Online Marketing Expert and NY Times Best Selling Author”
Implementing the Change
- Access the SEO settings of your homepage through your SEO plugin (like Yoast or RankMath).
- Edit the SEO title to include not just your brand name but also a concise description of what you offer.
- Use appropriate punctuation to separate the brand name from the description. Punctuation is mostly ignored for SEO purposes, so choose what visually appeals to you.
- Test different titles to find the one that best resonates with your target audience.
Note that changes won’t reflect immediately in the search results as it takes time for Google to crawl your updated homepage.
Google has the final say in what gets displayed, but a well-optimized title increases the chances of your preferred title being chosen.
Action Step
Take 5 minutes this week to optimize your homepage’s title tag and make a strong first impression on potential visitors.
2. Boost Your Site’s Trustworthiness with an Accessible “About” Page
In the digital world, trust is a currency. One simple yet effective way to build trust with your audience and Google is by making your “About” page easily accessible.
What is an “About” Page?
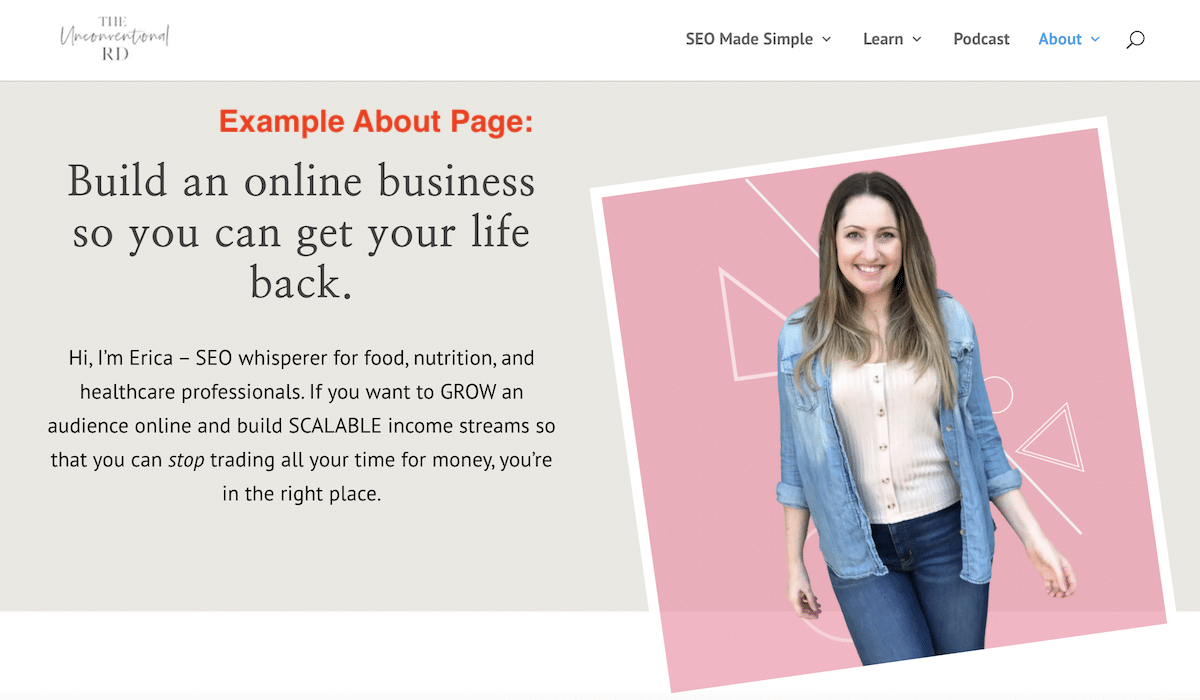
An “About” page is a section on your website where you introduce yourself and your business to your visitors. It is a space to showcase your journey, the mission of your business, and the people behind it, helping to build trust and establish credibility.
Why is an “About” Page Important?
- Google’s Preference: According to Google’s quality rater guidelines, a website that clearly indicates who is behind it is deemed more trustworthy, especially for topics that require trust, like nutrition.
- EEAT Principle: Showcasing the experience, expertise, authoritativeness, and trustworthiness (EEAT) of the people behind the content can significantly boost your site’s credibility.
How to Optimize Your “About” Page
- Main Navigation: Ensure that the “About Us” link is present in the main navigation of your website, allowing visitors to easily learn more about you, no matter where they are on your site.
- Content: Develop a high-quality “About” page that effectively showcases your EEAT. Consider sharing your journey, qualifications, and what visitors can expect from your website.
Action Steps
- Check: Visit your website to confirm if the “About Us” link is in the main navigation. If not, add it.
- Create: If you don’t have an “About” page, prioritize creating one this week.
- Learn More: For detailed guidance on designing an “About” page that resonates with your audience, consider enrolling in my SEO Made Simple course. Learn more about the course here.
3. Enhance Trust with Comprehensive Contact Information
What is a Contact Page?
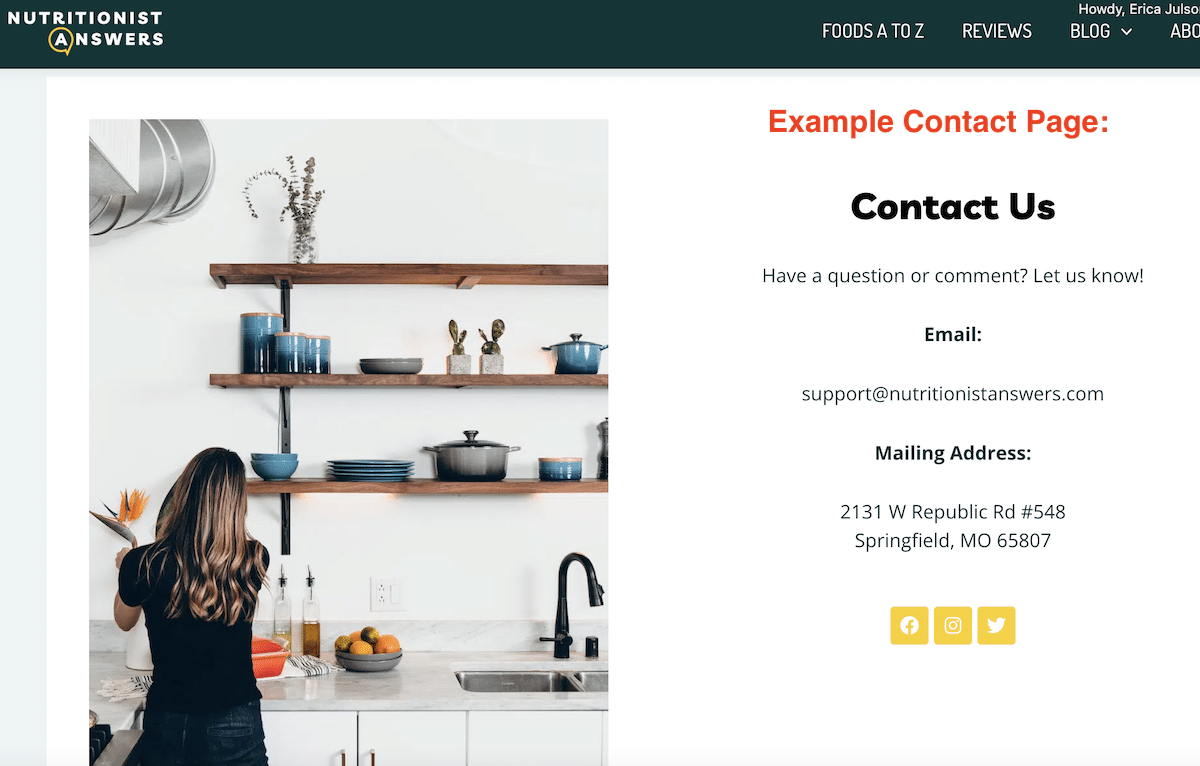
Just like you need to have an easily accessible “About” page for readers to learn more about who is behind the content, you also need a clear “Contact” page in case someone needs to get in touch with you.
Why is Contact Information Important?
- Building Trust: Clear contact information showcases transparency, making your site appear more trustworthy.
- Google’s Preference: Websites with detailed contact information score higher on Google’s EEAT metric, potentially improving your site’s ranking.
- User Convenience: It facilitates easy communication between you and your visitors, enhancing user experience.
How to Set Up Comprehensive Contact Information
- Diverse Contact Options: Offer various ways for visitors to contact you, including different email addresses for distinct inquiries, such as [email protected] and [email protected].
- Affordable Solutions: Utilize affordable services like Google Voice and PostScan Mail for phone and mailing solutions, respectively.
- Business Email: Set up a professional business email through platforms like Google Workspace, which allows you to create aliases that funnel into the same inbox.
Action Steps
- Gather: Compile your email address, mailing address, and phone number.
- Create: Develop a “Contact Us” page with all the necessary information.
- Link: Ensure the “Contact Us” page is easily accessible through the main navigation or footer of your website, preferably both.
- Budget: Allocate a small budget (under $50/month) to set up legitimate contact avenues, considering it a normal business expense.
4. Build Trust with Detailed Blog Post Metadata
What is Blog Post Metadata?
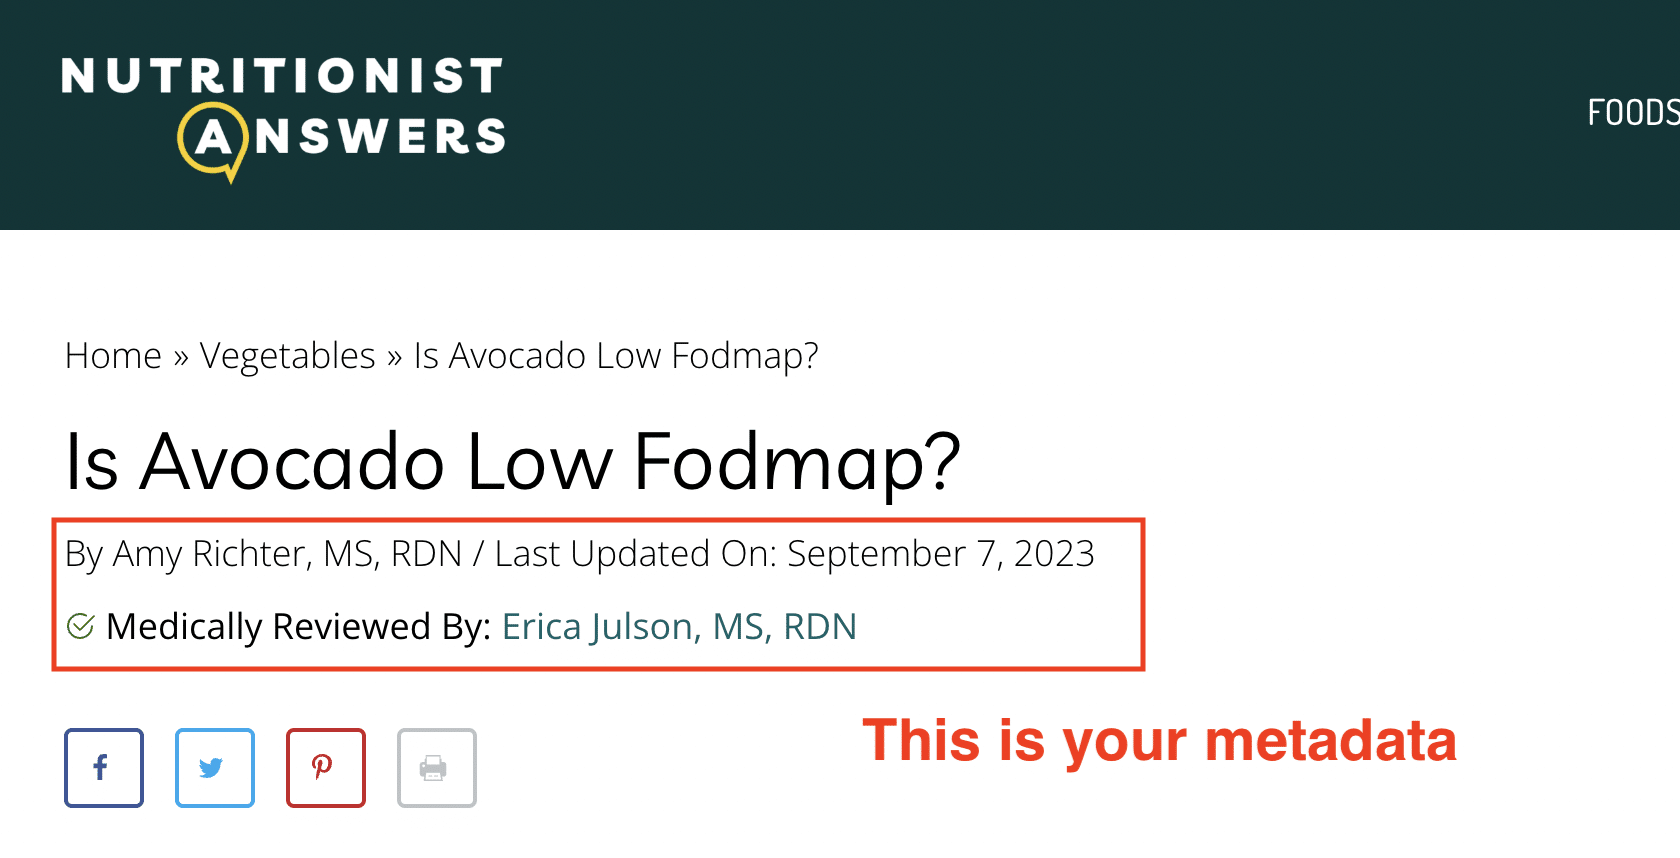
Blog post metadata refers to the information displayed in the byline underneath your blog post title, including the author’s name and credentials, and the dates the post was published or last updated.
Why is Detailed Metadata Important?
- Trust: Displaying detailed metadata can enhance the perceived trustworthiness of your content.
- Google’s Preference: Even if not visible to users, metadata is accessible to Google bots, potentially influencing your SEO positively.
- User Convenience: It helps readers to know the recency and reliability of the content, enhancing user experience.
How to Optimize Your Blog Post Metadata
- Author Details: Ensure your full name along with credentials is displayed as the author. Avoid using weird usernames or leaving the author section blank.
- Publication and Update Dates: Showcase the dates the content was published and last updated to reflect the timeliness of your information.
- Author Box: Consider using plugins like Molongui Authorship to add an author box under each post, featuring a photo, bio, and links to social profiles and websites.
Action Steps
- Check: Open a blog post on your site and review the metadata displayed under the title.
- Update: Modify your author name display through WordPress settings by navigating to “Users” → “All Users” → Your username –> “display name publicly as”.
- Theme Settings: Adjust the visibility of publication and update dates through your theme settings. If necessary, find custom codes online to add this functionality.
- Plugin: Install the Molongui Authorship plugin to enhance the author section with additional details and a trust boost.
5. Enhance User Experience with a Table of Contents
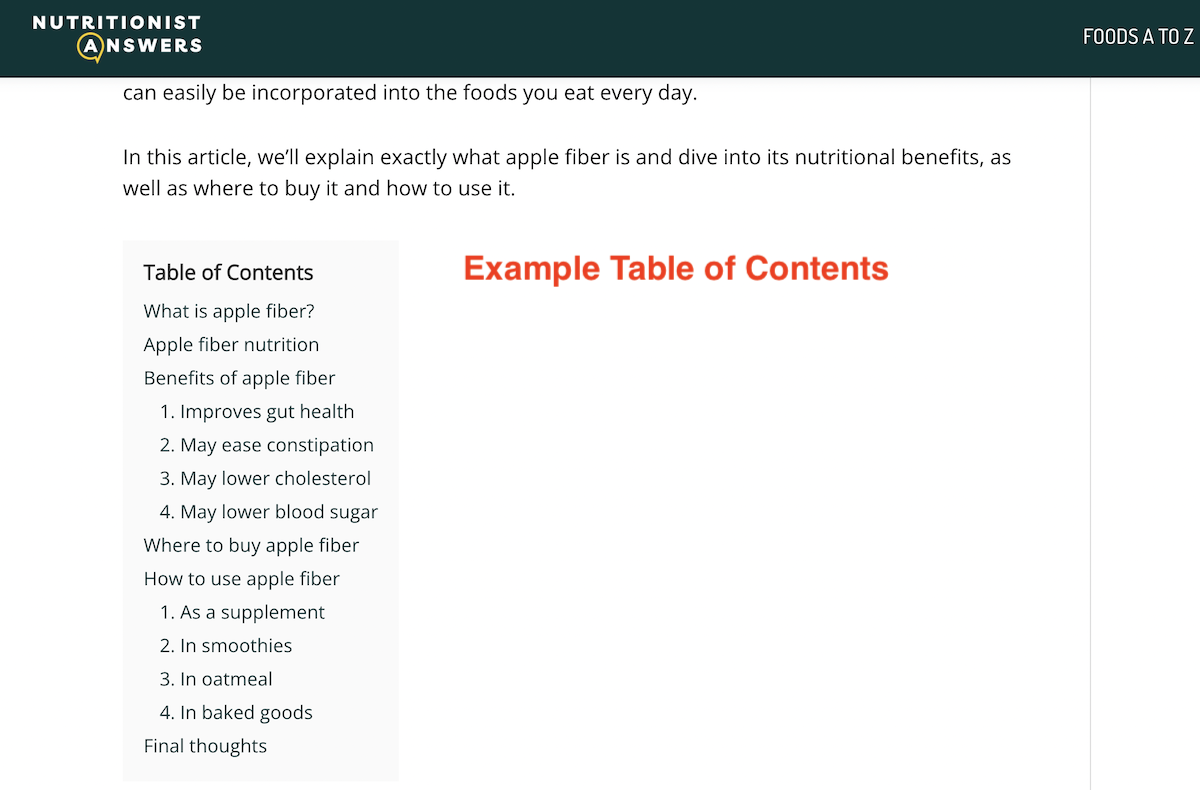
What is a Table of Contents in a Blog Post?
A table of contents in a blog post is a clickable outline displayed at the beginning of a post. It allows readers to jump directly to different subsections of the article, enhancing the user experience and potentially improving your Google search results with jumplinks.
Why is a Table of Contents Beneficial?
- User Experience: It facilitates easy navigation through your content, especially in longer blog posts.
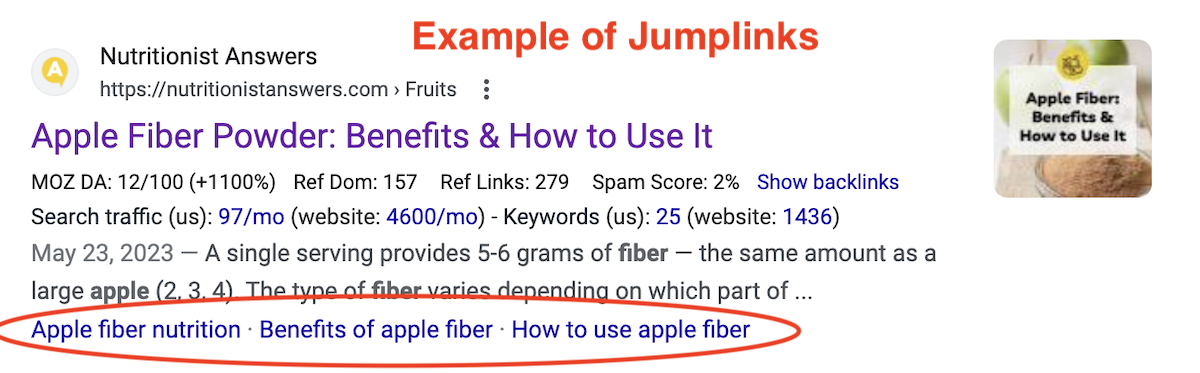
- SEO Advantage: Google can display the jumplinks created by the table of contents in the search results, making your snippet more rich and enticing to click on.
- Unique Feature: Utilizing a table of contents can help you stand out in the search results if others are not using this feature.
How to Implement a Table of Contents
- Identify Suitable Posts: Choose longer blog posts where a table of contents would enhance navigability.
- Plugin: Use plugins like “LuckyWP Table of Contents” to easily add a table of contents to your posts.
- Structure: Ensure your blog post is well-structured with clear headings and subheadings to make the most of the table of contents feature.
Action Steps
- Review: Check your existing blog posts to identify where a table of contents can be beneficial.
- Install: Install a reliable plugin to add a table of contents feature to your blog.
- Learn More: For detailed guidance on structuring blog posts optimally and using the table of contents plugin, check out my signature course, SEO Made Simple.
6. Claim Your Google Knowledge Panel for Greater Control
What is a Google Knowledge Panel?
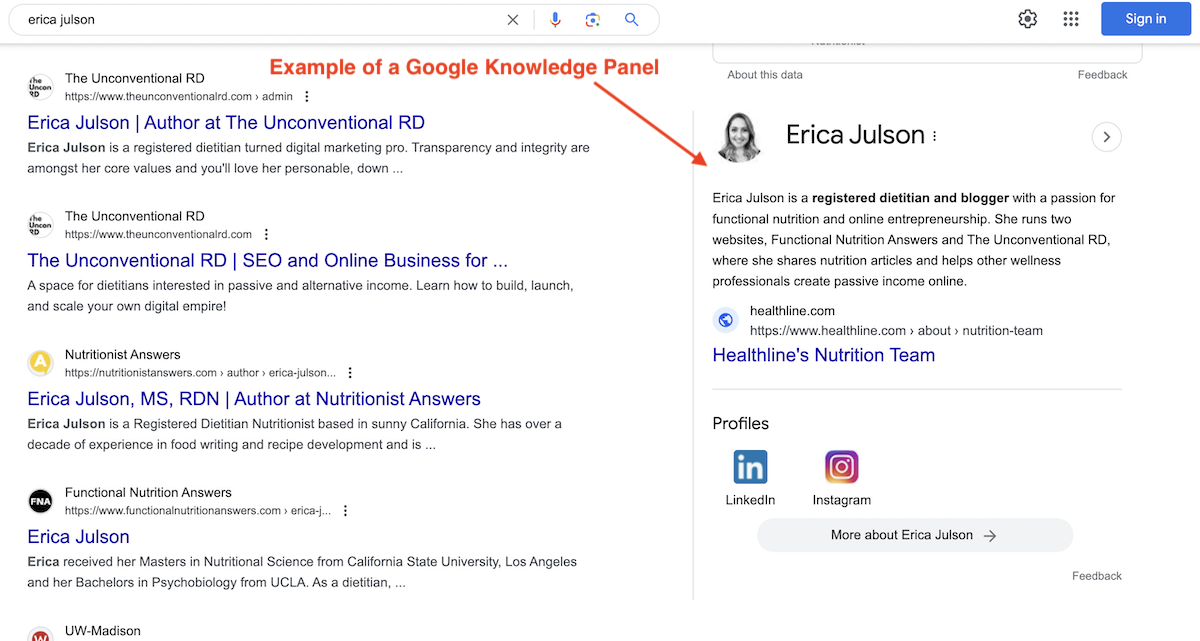
A Google Knowledge Panel is a box that appears in the Google search results, usually on the right-hand side on desktop views, showcasing important information about a well-known person or entity. It can include details like a brief bio, website link, social media profiles, and other relevant data sourced from Google’s knowledge graph.
Why is Claiming Your Knowledge Panel Important?
- Control: Claiming your panel allows you to have editorial control over the information displayed.
- Accuracy: Ensure that the information presented about you or your business is accurate and up-to-date.
- Authority: Having a knowledge panel can signify that you are a recognized authority in your field, enhancing your online presence.
How to Claim Your Google Knowledge Panel
- Check Regularly: If you are building a notable presence in your niche, check every 6 months to see if you have been allocated a knowledge panel.
- Claim: If you find a knowledge panel about you, click the “claim this knowledge panel” button at the bottom of the panel to initiate the claiming process.
- Verification: Be prepared to go through a verification process to confirm your identity with Google.
Action Steps
- Aspire: If you don’t have a knowledge panel yet, aspire to build a notable presence in your field to eventually earn one.
- Publish: Consider becoming a published author to enhance your chances of getting a knowledge panel.
- Claim: If you are fortunate to have a knowledge panel, claim it to have editorial control over the information displayed, ensuring it is accurate and presents you in the best light.
Final Thoughts
I hope you enjoyed these six quick SEO tips that take 20 minutes or less to implement.
Figure out which of these tips you’re not already doing and then go take action this week to see some improvements in your website and search engine optimization.
As always, if you’d like more guidance and support along your blogging journey (and want to learn my 4-step framework for growing your audience with SEO), watch this free training.

Erica Julson is a registered dietitian turned digital marketing pro.
She has over 15 years of experience blogging and building online businesses and has taught over 1,000 wellness professionals inside her programs.
Since starting out online, Erica has earned over $1 million dollars in revenue and built 5 different blogs. She now uses her knowledge to help others succeed in the online space, via her YouTube channel, podcast, blog, Facebook group, and online course.
Transparency and integrity are amongst her core values and you'll love her personable, down to earth teaching style.
