If you run a website and decide to work with a website support team, they will likely need to be added as as administrator on your website.
This is so that they can quickly and easily access your website to perform updates, site speed work, security hardening, and more.
Adding someone else as a user on your website allows them to access your website without you having to share your personal username or password.
This article will walk you through all the steps you need to add someone else as an administrator on your self-hosted WordPress website.

Would you like to save this?
Step 1: Log into your website
Log into your website and go to the main WordPress dashboard.
Step 2: Go to Users –> Add New
On the left hand side of your WordPress dashboard, go to the “Users” section and click “Add New.”
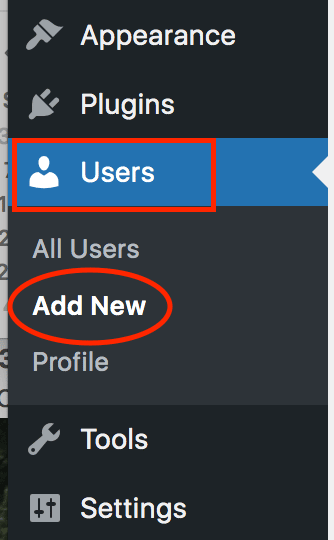
You should see the following on your screen:
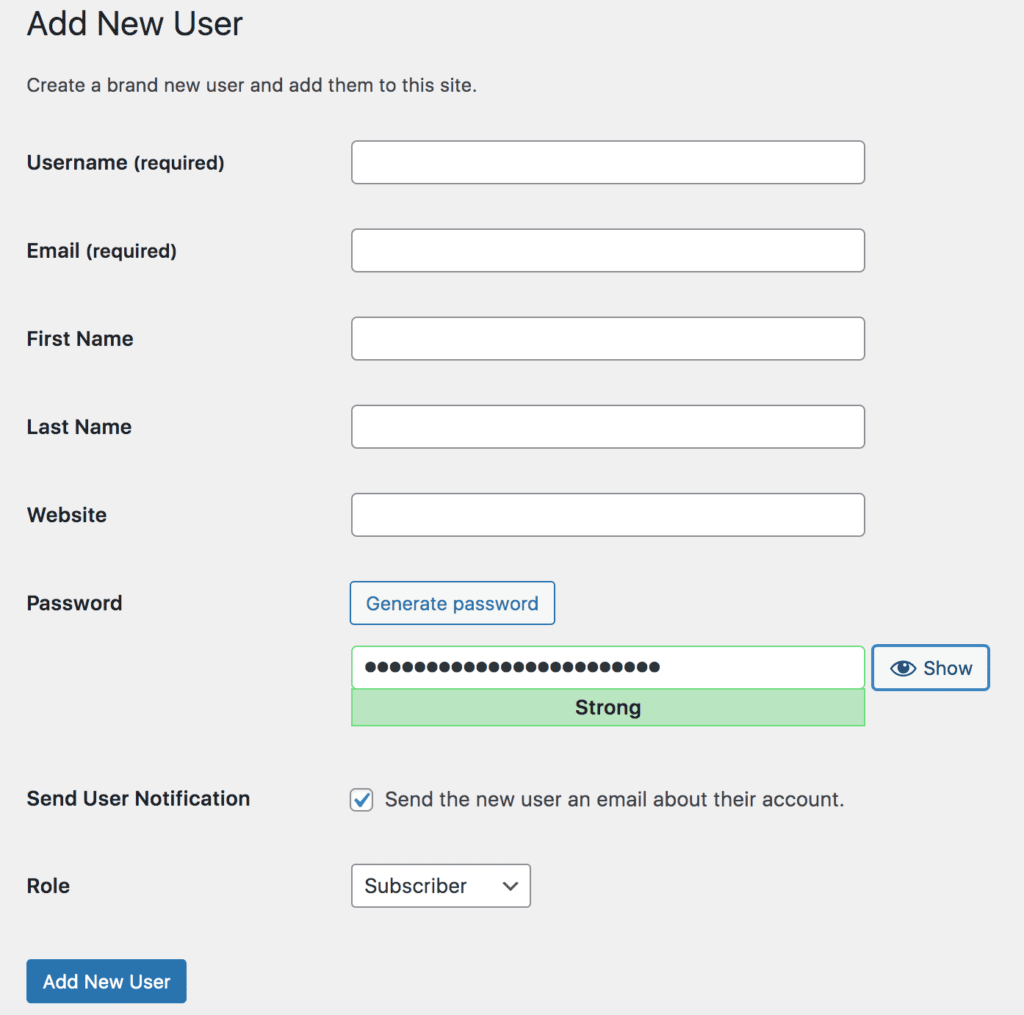
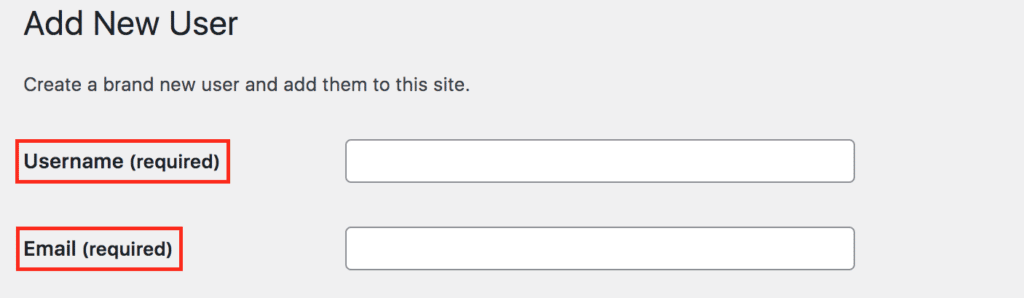
Step 3: Fill out Username and Email
Next, we’re going to fill out all the important information, starting with username and email (both are required).
If you are enrolling in one of our Website Support Plans, please enter the following:
Username: theunconventionalrd
Email: [email protected]
Leave the “First Name”, “Last Name”, and “Website” fields blank.
If you are using a different support person, contact them to determine what information to enter.
Step 4: Create a password
By default, there will already be an auto-generated password in the password box.
You don’t need to do anything here, just leave the autogenerated password.

Step 5: Make sure the new user is notified
Keep the “Send User Notification” box CHECKED.
This will send the new user an email once their account is created and allow them to reset the password to one of their choosing.

Step 6: choose the correct role
By default, all new users are given the role of “Subscriber”.
However, in order for your website support person to be able to actually work on your site, they will need administrator access.
IMPORTANT: Change the “Role” to “Administrator” if you are adding us as a user for one of our Website Support Plans.

(If you forget, you can always go back and adjust the role for any user within the Users area of WordPress.)
Step 7: Add New User
Click “Add New User” on the bottom left and that’s it!

You’ve successfully added a new user to your self-hosted WordPress website.
Optional: Change or remove access
If you ever need to remove someone’s access to your website, you can do so within the “Users” area of WordPress.
Simply hover over the user you want to remove and click “Delete”:

To change their role, click “edit” under the user and then change the role to whatever you’d like.

Erica Julson is a registered dietitian turned digital marketing pro.
She has over 15 years of experience blogging and building online businesses and has taught over 1,000 wellness professionals inside her programs.
Since starting out online, Erica has earned over $1 million dollars in revenue and built 5 different blogs. She now uses her knowledge to help others succeed in the online space, via her YouTube channel, podcast, blog, Facebook group, and online course.
Transparency and integrity are amongst her core values and you'll love her personable, down to earth teaching style.

Fantastic guide! Your clear instructions and visual aids made adding a new user to WordPress a breeze. Thanks for simplifying the process!